|
|
|
Diff Lock Grease Application (Rear differential used in this illustration) | |
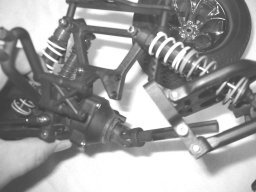 |
To begin you need only remove screws from one side of the assembly to get your diff out. Screws to be removed are (1) turnbuckle, (2) shock tower, (2) bumper, (2) bumper mount, (2) chassis to bulkhead and (2) skidplate to bulkhead. It is a good idea to mark the case for assembly orientation as it is easy to re-install backwards. When in doubt, refer to your RC truck manual for the "exploded view" of your truck. |
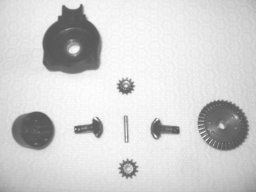 |
Disassemble diff and remove spider gear box. Clean all parts well of grease and dirt. Denatured alcohol works well for this. Now is a good time to check gear teeth and mesh. If your gear mesh is too sloppy, you may need to replace or shim gears to take out the backlash. Otherwise, after diff assembly you may hear a clicking or dragging noise that was not present before. |
 |
Using the supplied applicator stick, pack Diff Lock Grease in to the spider gear box until half-full. Place spider gears in and finish filling to the top. Be careful not to get this grease on your hands as it is very hard to get off. Take your time and use the "spaghetti-fork" method of getting the grease out of the container by simply rolling the applicator until the grease strings (yes, it's that sticky) detach from the tub. |
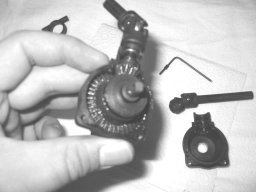 |
Prior to further assembly, you will want to smear a light coat of Diff Lube to the ring gear and output gear as well as around the inside of the differential case. Do NOT use Diff Lock Grease for this! A light automotive grease may work well also. Upon completion of the above procedure you will now have a "limited-slip-like" differential for improved traction on loose packed or uneven surfaces. |
home | about us | shipping information | f.a.q. | site map |
|
Tower Hobbies |
 PayPal account not required |
ROAR Affiliate |
| Copyright © 2000-15 badhorsie.comTM All Rights Reserved. |