|
|
RC Shock Cover Installation | |
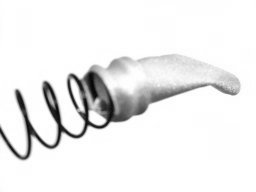 |
The installation of shock covers is simple and the more you practice the easier it becomes. To begin, get the shock boot started over one end of the spring. We have found that filing off the sharp coil end will help ensure the least amount of "snagging" during this step. In some cases, simply trying the other end of the spring may give better results. |
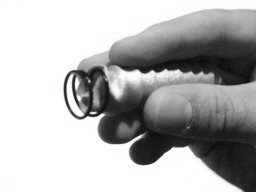 |
Next, place your fingers around the shock cover and spring (see left) and rotate the spring into the shock cover with your other hand. Turn the spring in the direction that the coil needs to rotate in order to "drive" into the Shock Sock. Be careful of "snagging". Once the spring is completely covered, center the spring inside the shock cover and stuff the ends in. Mount the shock spring onto the shock body. |
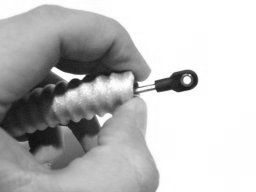 |
At this point, you may have to "re-roll" the ends of the shock cover into the opening to attain correct tension. "After doing so, pinch the cover against the sides of the spring to keep it from coming out and squeeze the spring upwards so you can add the spring retainer. |
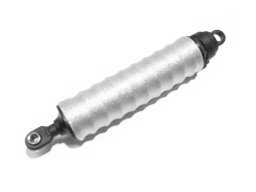 |
Lining up the opening in the shock retainer with the seam on the shock cover will typically make it fit best.
Although your Bad Horsie RC Shock Covers come nicely coated with Scotchgard™ protectant we suggest investing in a can of your own and always use it after washing your Shock Covers. We use Scotchgard™ protectant exclusively for its ability to repel stains and make things easier to clean. Check out our "How to Wash your Shock Covers " article on the "F.A.Q." page. |
home | about us | shipping information | f.a.q. | site map |
| Copyright © 2000-18 badhorsie.comTM All Rights Reserved. |